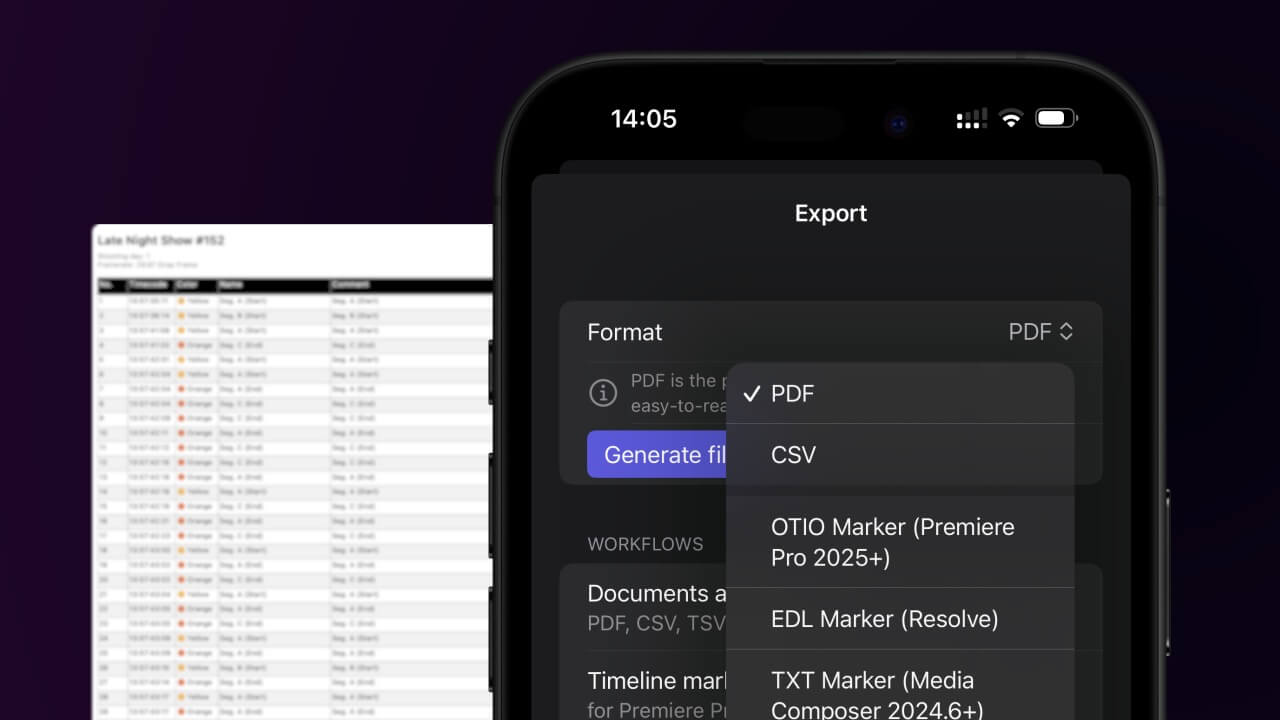
1. Export a Final Cut 7 XML marker file from Live Timecode Notes app
Open the project in the app, then select "Export Notes" from the top menu. Select "XML Marker (Premiere Pro)" and activate "Sort by Timecode". Generate and save the marker file.
2. Import the Final Cut 7 XML marker file into Adobe Premiere Pro
To import timeline markers, go to "File -> Import" and select the XML file.
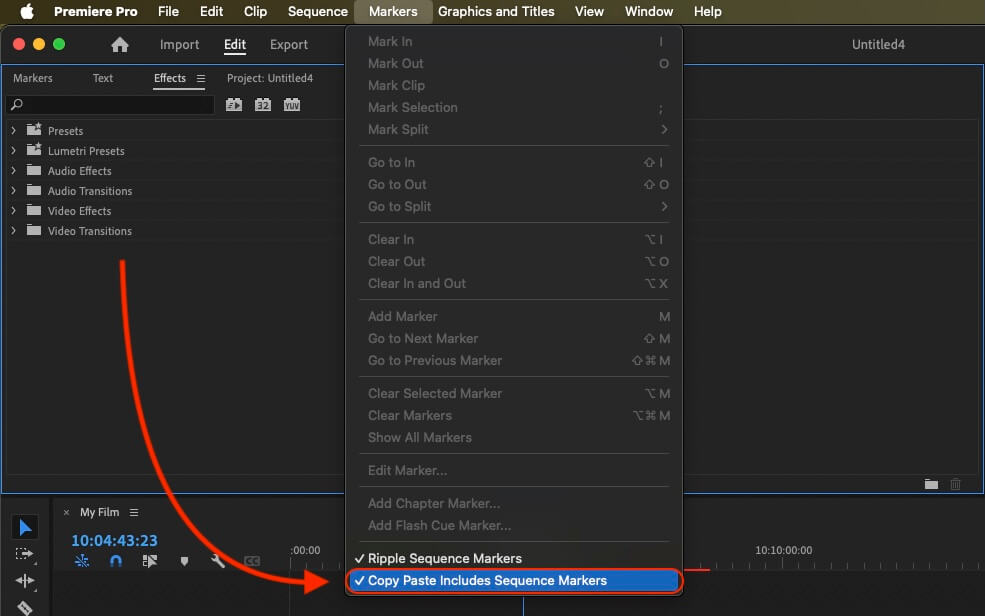
If you want to copy these markers into the existing sequence, use the adjustment layer or any other video as placeholder. Then copy the clip and switch to your existing sequence. Move the cursor to the location, where the adjusmtent layer or first marker appeared in the other sequence. Then past it. It will only copy the timeline markers if under setting (in the Markers menu) the option "Copy Paste Includes Sequence Markers" is active.
🚀 Done
That's all for now! If you found this tutorial useful, please share it to support us. If you have any suggestions on how we could improve the workflow, please let us know!